EDITING WORKFLOW SERIES: Ep. 02 - Media Management w/ HEDGE
- Aug 30, 2019
- 3 min read
Updated: Aug 18, 2022
Hey, I'm Ben Gill with Oxenfree Film & Motion and welcome back to our Editing Workflow series.
In episode one, we covered folder structure and now we're moving on to the next step, which is ingesting your media on-set and the software that we use for ingest is Hedge for Video.

Before discovering Hedge, we just used to use Finder to copy over media. While that works, you were never really confident in that your files were perfectly copied over.You ran the risk of a file coming up as corrupted and you had no idea until you got into the edit. And another thing is it took forever.
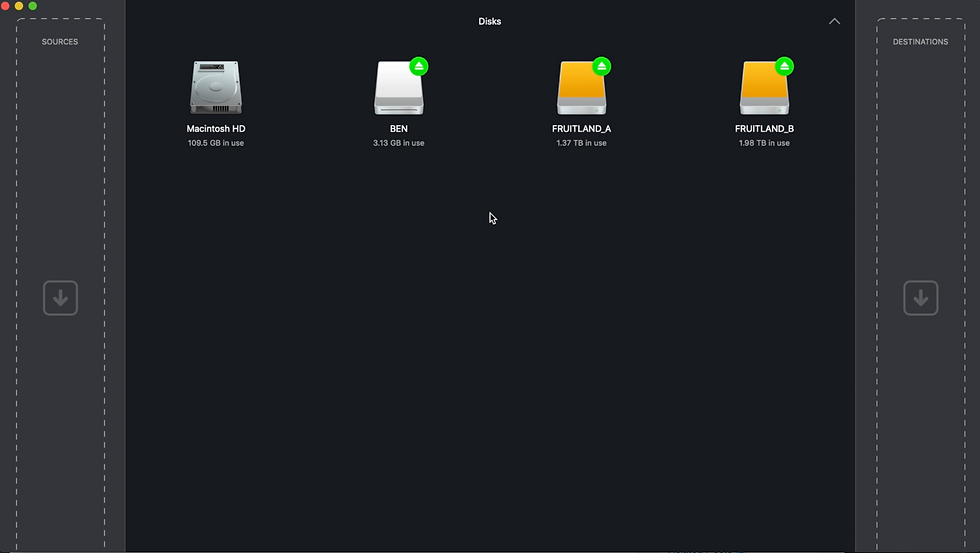
So, the two immediate appeals of Hedge over that method is that Hedge is so much faster than the Finder. It's been optimized for large file sizes and you can do simultaneous backups. And the first thing you'll notice about Hedge is the interface is so simplistic, with the left side being sources and the right side being destinations.
Let's show an example.
So, here's an SD card with some footage on it. And one of the good things about Hedge is that if you use the card multiple times it'll auto-detect the source as one that it's seen before. So it'll automatically drop it into the source or into the destination if it's seen it already. And I also have two hard drives plugged in, the main drive and the backup drive. Each have identical folders have already been customized for this new project, like we showed in episode one.

I'm gonna go ahead and drag the SD card into the source window on the left. Hedge now allows you to set labels for your sources so you can label it the camera that you're shooting with, or A001, whatever you want. And on the right I'll drag the two hard drives into the destination window.

So, on our source, we're just gonna copy over the whole card, just to make sure we have all the media from that card and there weren't any sneaky stills or anything, and on the destination folder, we're gonna select the same folders in the same places on both drives.

When you drag your mouse over the hard drive icon, a graphic with three horizontal lines will appear. Click on that, go down to the Project folder, click Browse, from there, a window will open allowing you to choose a specific destination.
In this case, we want to choose the same destination on both drives. And from here, you can still create a new folder if you didn't create one already.
In our case, I'll click on this project and go to our media folder.

Since this is the first source we're gonna copy over on this project, we'll choose A001 and press select. And do the same thing for the backup drive to ensure that both drives are still mirrored. Once that's set up, click "Add Transfer" and the footage will start transferring.

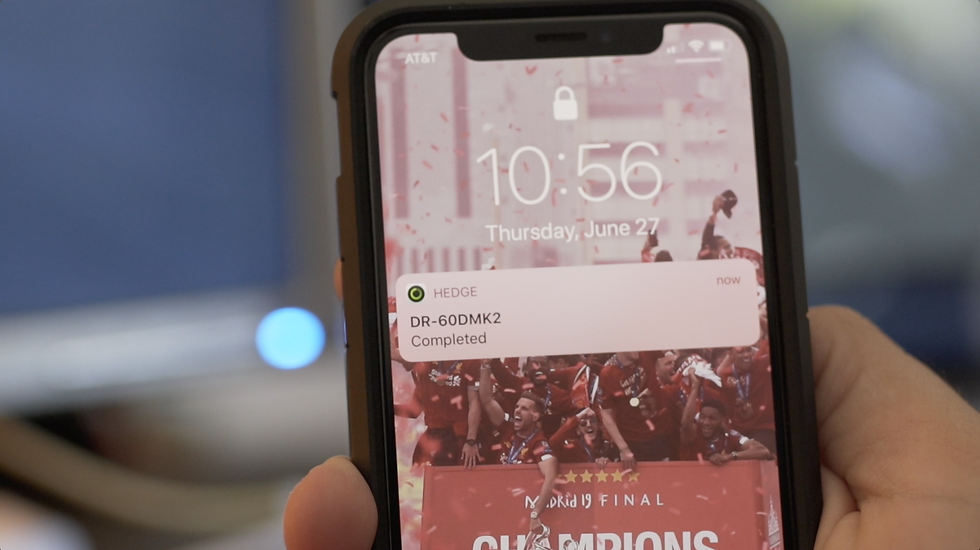
I want to suggest downloading Hedge's free mobile app Connect that'll message you when a transfer is complete.
So, as you can see on the transfer, there's a little semi-transparent hatched line that's going along before the green line, and that line is the check zones. It's double checking that every piece of data is copied over correctly.

Once you get that full green bar with a check mark, it'll say the transfer is complete, you have that peace of mind that the check zones made sure that every file was copied over correctly and there were no errors.

And next to every folder that's copied over, you'll find the transfer logs and that's it. It's really that simple.

And that's the end of our episode two on ingesting.

Next in our series we'll be covering our Adobe Premiere Pro workspace and how we organize it.

Now, we wanna hear from you, so I'm interested to hear what other ingest softwares that people are using and how Hedge stacks up against the other softwares.
Please let me know in the comment section below, and please consider subscribing, and I'll see you next time.


Comments